Create your first auction
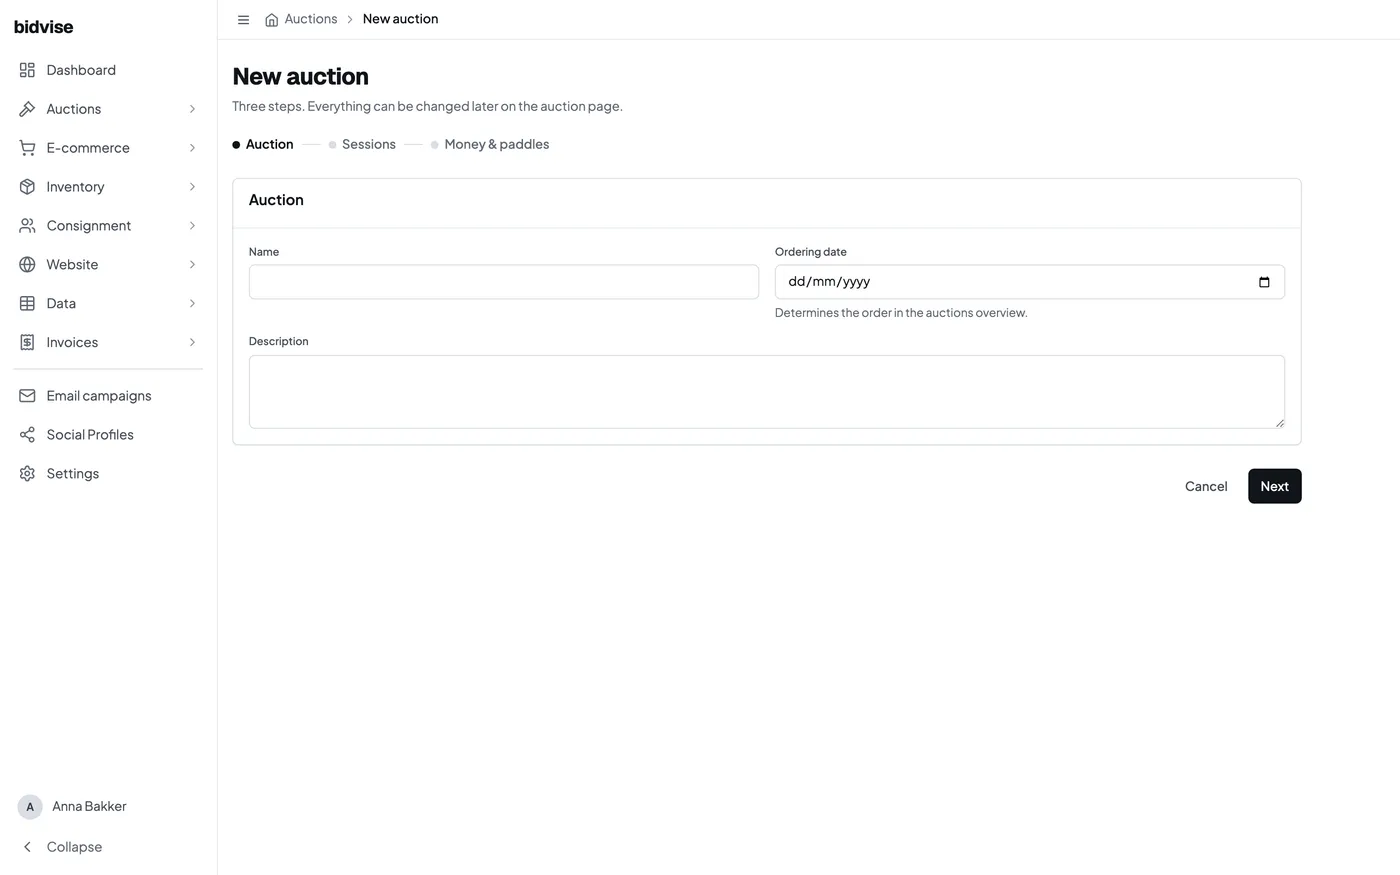
An auction is the sale your customers recognise. It may contain one session or several sessions, and each session can be timed or live. The creation wizard records the shared auction details first, then the sessions and financial defaults.
1. Describe the auction
Give the auction a name and an optional description. The ordering date controls where it appears in the auction overview. These details can be changed after creation.
Use the name a bidder should recognise, such as Autumn Modern Design, rather than an internal planning label.
2. Add the sessions
Each row in the second step creates one session. Enter its public name, choose timed or live, and set the dates that apply to that format.
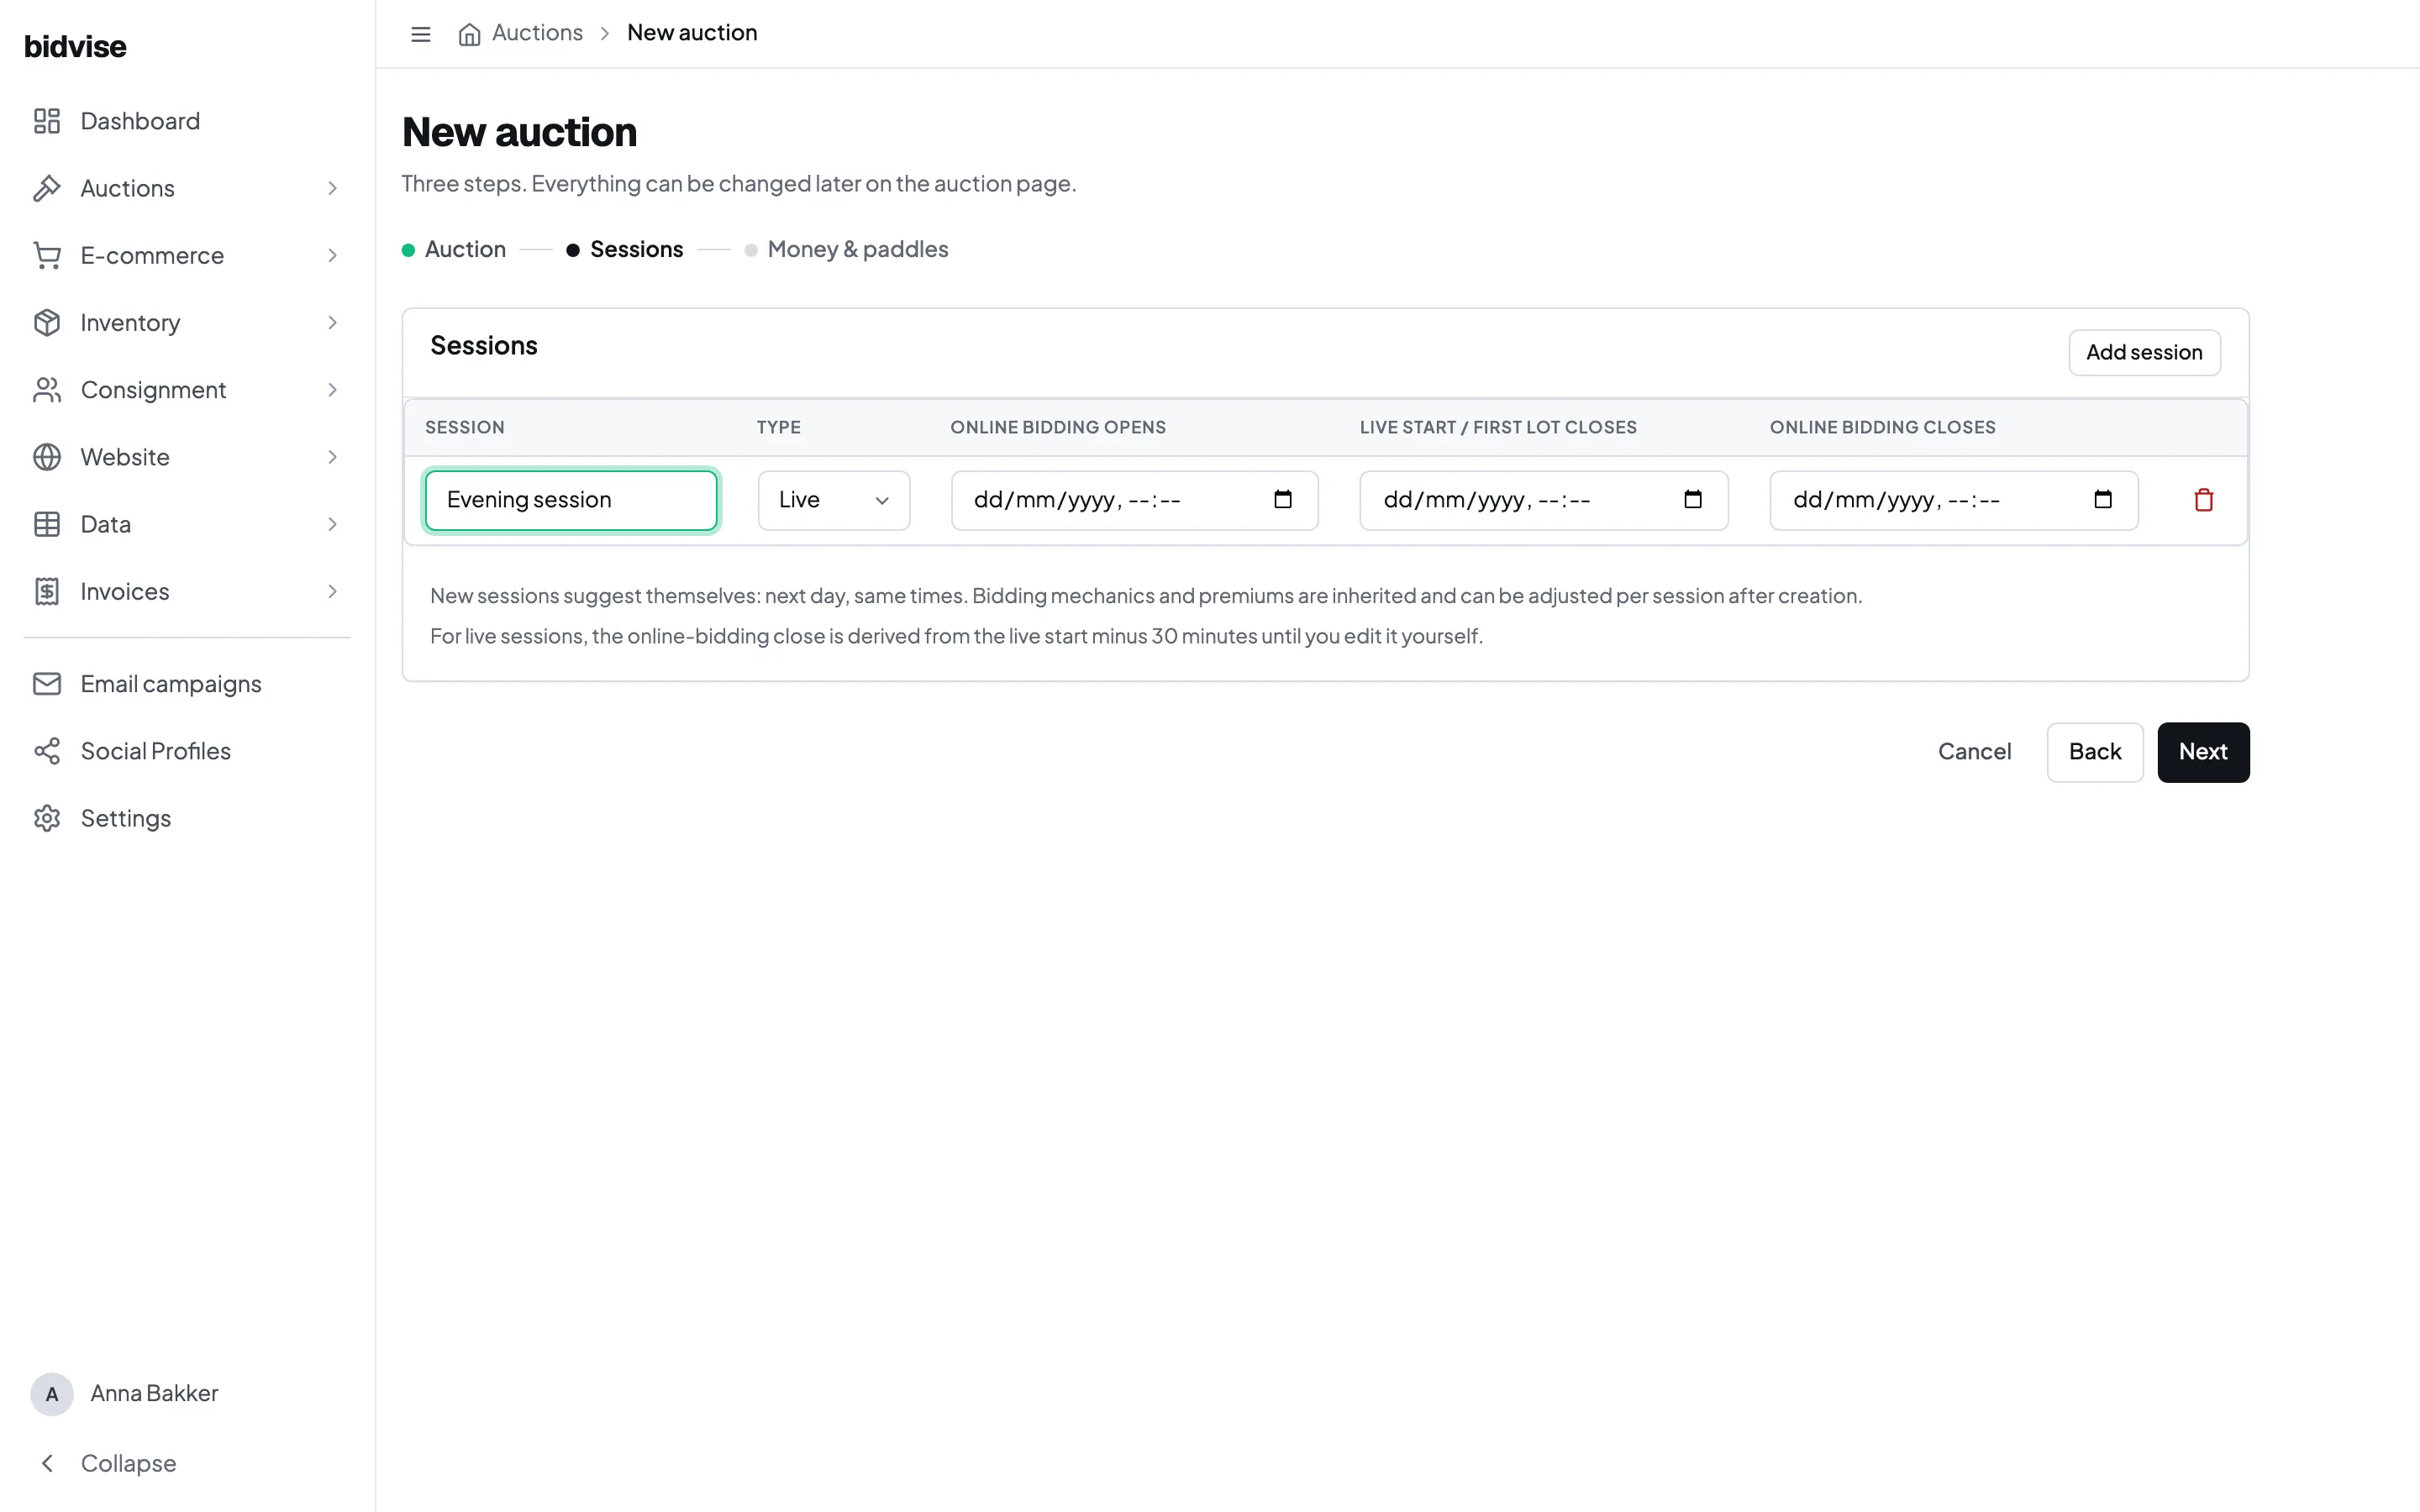
For a timed session, set when bidding opens and when the first lot closes. The remaining lots follow the session rhythm. For a live session, set the live start and the point at which advance online bidding closes. Add another row when the sale needs another day or format.
3. Check money and paddles
The last step sets the auction’s VAT process, buyer’s premium and paddle requirement. The form suggests your current house defaults, and you can adjust a session after creating the auction.
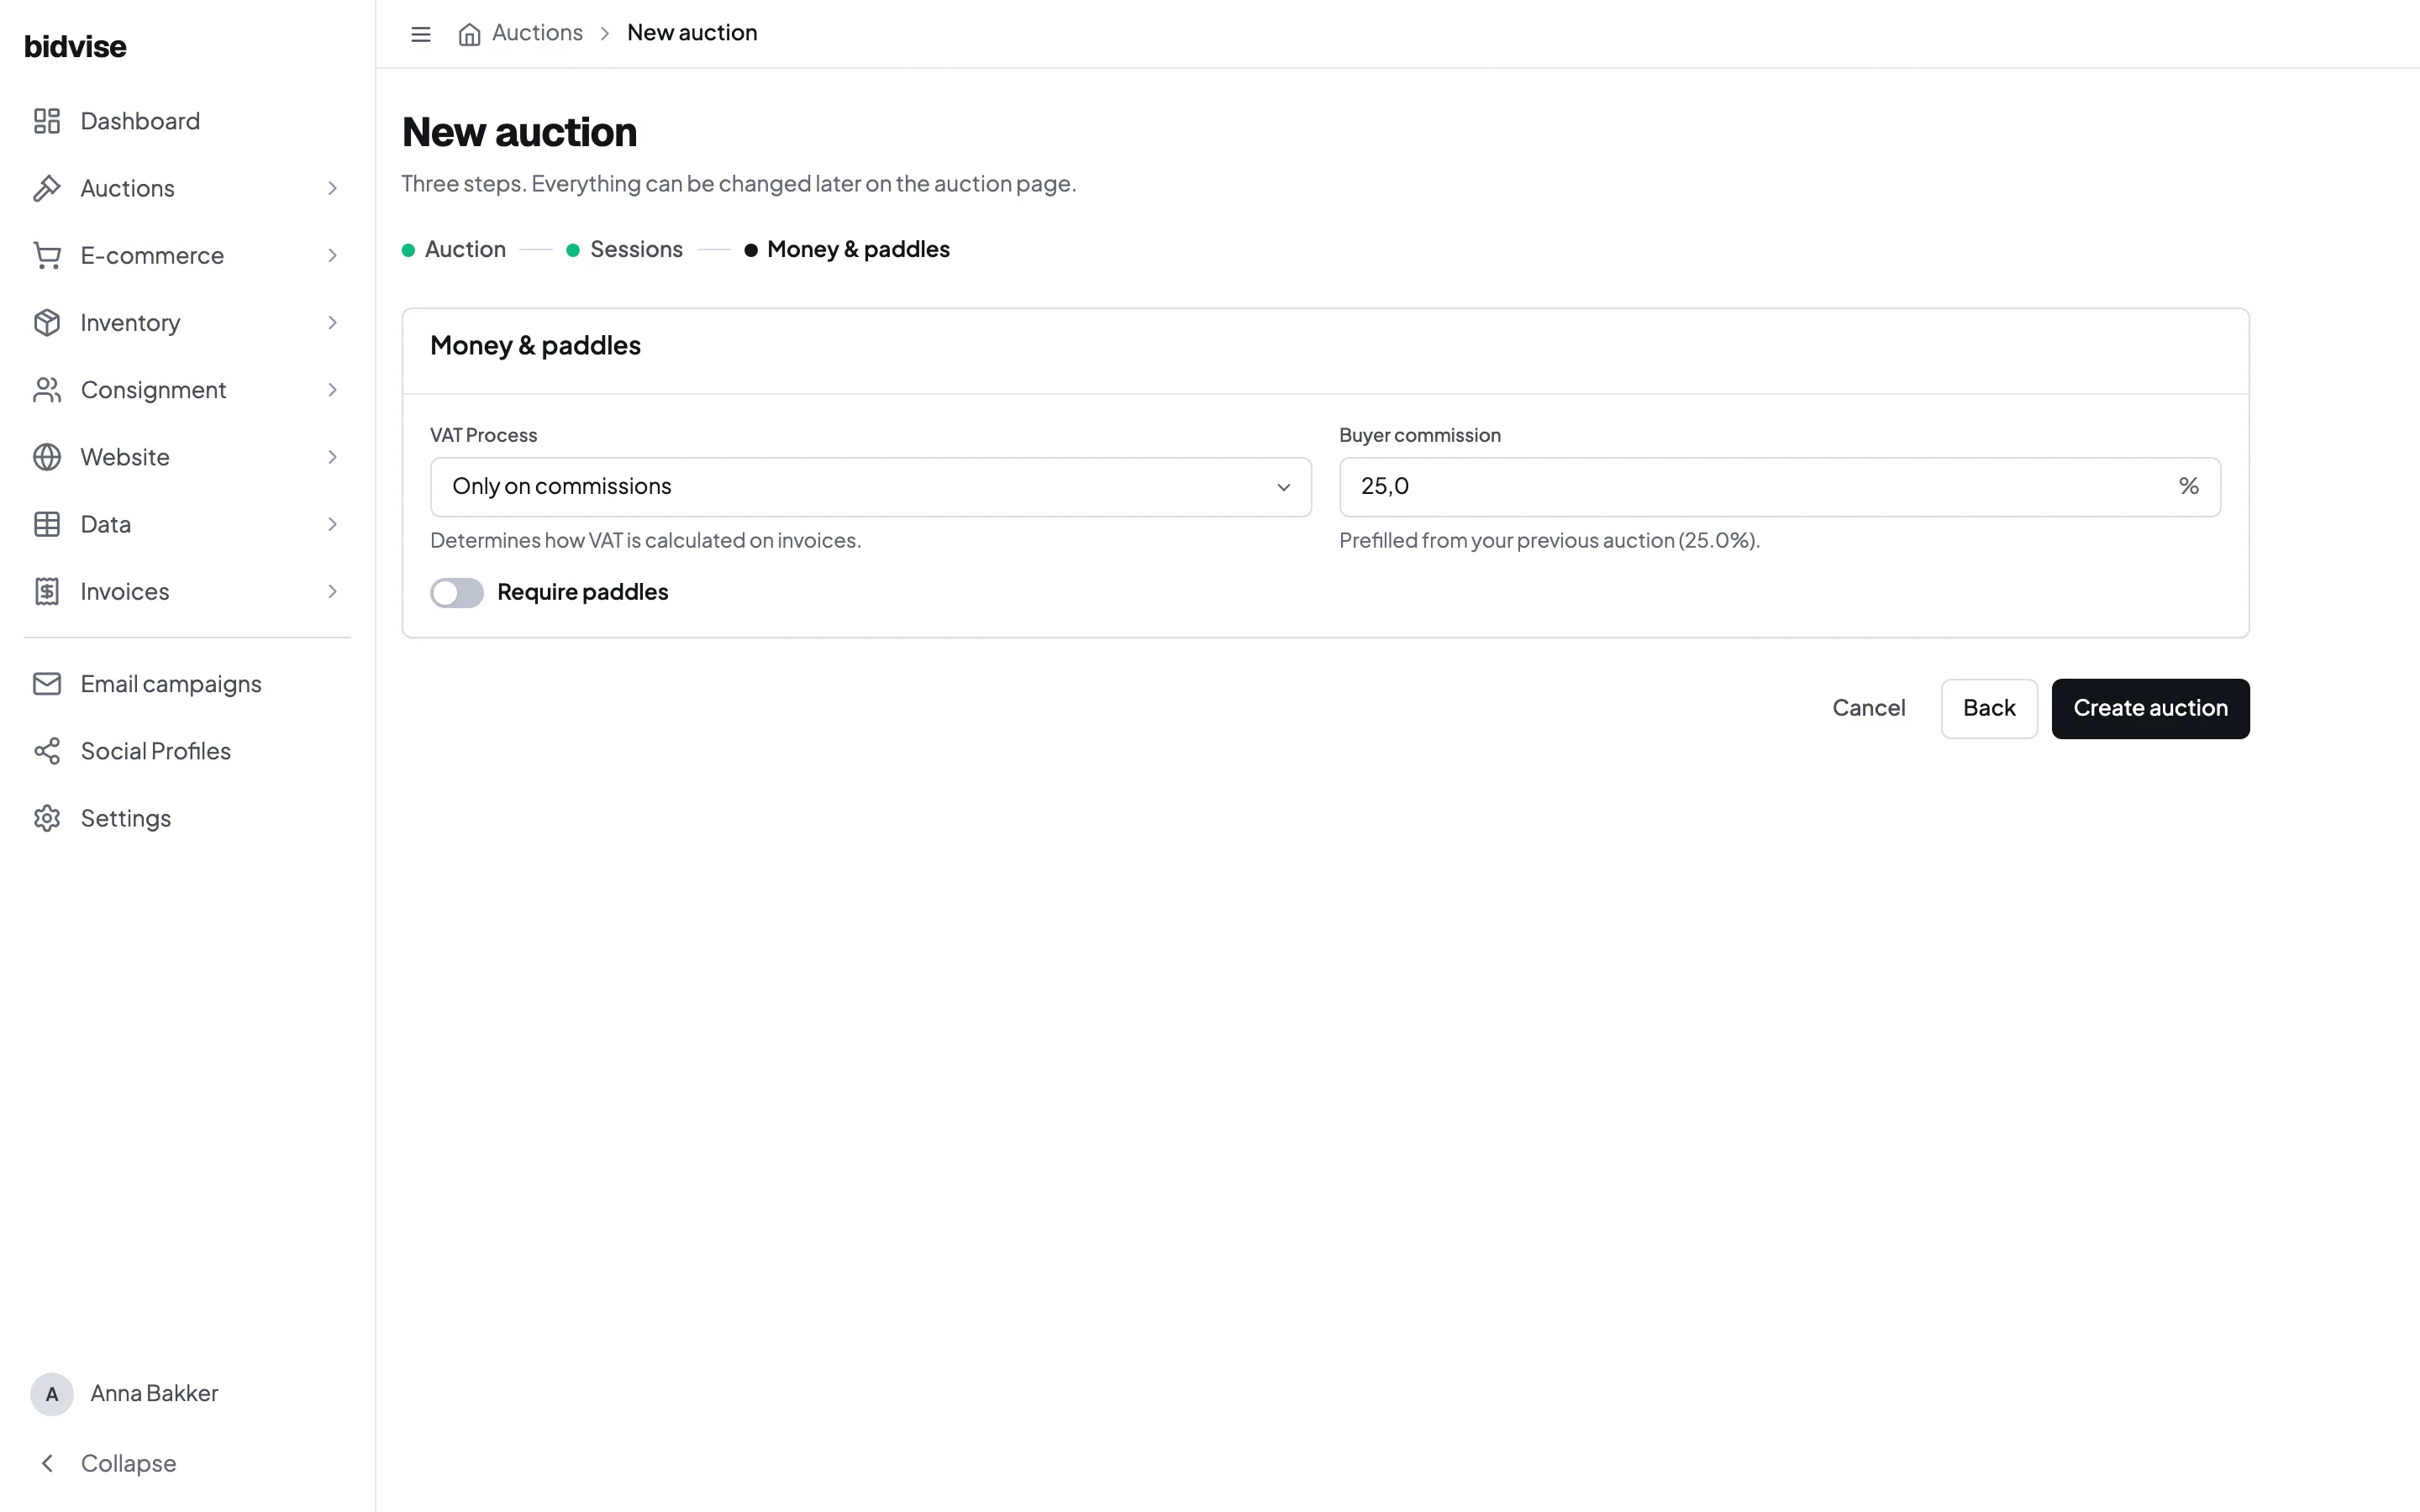
The buyer’s premium is paid by the buyer on top of the hammer price. It is separate from seller’s commission, which belongs to the consignment terms.
Add the catalogue
After creation, add items to each session as lots. You can work in the lot list or use Import and update lots from a spreadsheet for a larger catalogue.
Review the session dates, lot order, estimates and bidding settings before making the sale public.